There are many sites and videos in the internet that have great turtorial on how to make a car cake particularly McQueen from the Cars Disney movie, but this site really have detailed steps on how to accomplish the look. For those who are looking for great tutorials, this is it. There is also another site which I will be posting next.
Thank you to www.makefabulouscakes.com for the great help!
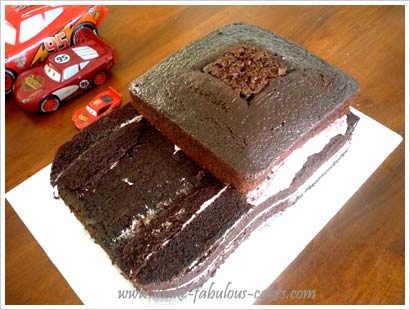
Once the cake is baked and cooled, torte the 9" x 13" sheet cake in half and fill with desired filling. Place the 8" square cake on one side of the cake. Carve the contours of the sheet cake to give it an aerodynamic feel. Save the carvings and place on the sides of the hood.
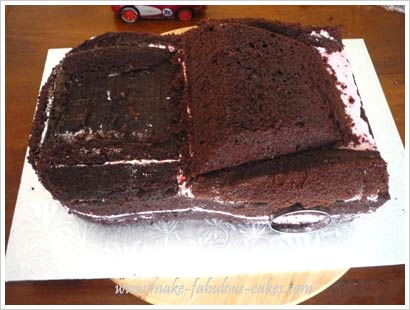
 For the roof of the car, cut the front "windshield" part on a slight angle. Cut the top part of the roof also in an angle and the sides tapering to the back. Again, save the pieces of scrap and place on the back side part. Carve if necessary. Take a 2" round cutter and press on the sides of the cake where the wheels are going to be. Use a small metal help spatula to scoop out inside the circle.
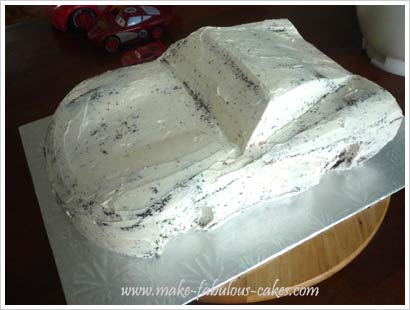
 Next, crumb coat the carved cake with buttercream. Place in the refrigerator to chill.
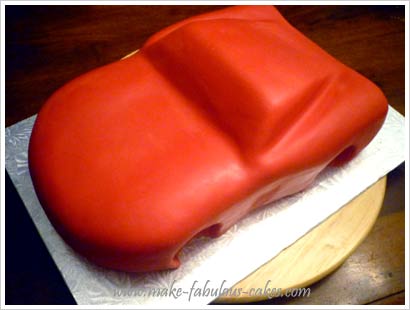
 Cover the chilled cake with red fondant and smooth it using hands and the fondant smoother, whatever works for you.
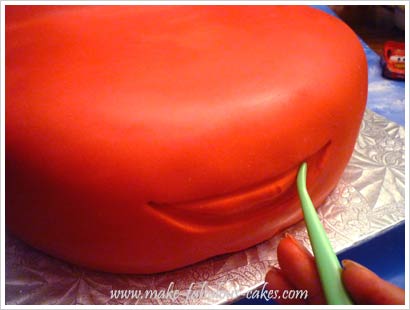
 Use a veining tool to shape Lightning Mcqueen's mouth. First, make the contour of the mouth then use the tool to press inside.
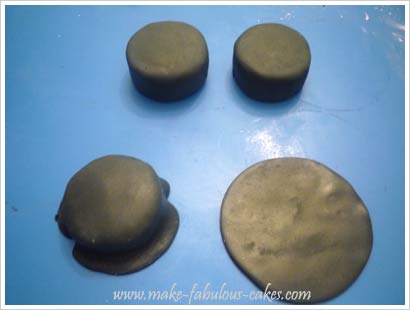
 The wheels are cupcakes crumbcoated with buttercream and covered with black fondant. You may need to trim the cupcakes to make it the same size of the holes made earlier. Cut a smaller round from red fondant for the "rims" of the wheel. Punch out some holes all around using a plain pastry tip. Place the wheels in the holes, use some buttercream if needed. Write out "Lightyear" with white buttercream.
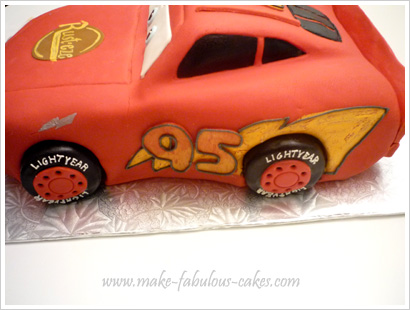
 For the signs on the side of the car cake, mix some yellow gel color mixed in with a bit of lemon essence or vodka and paint the "lightning". Cut out the numbers from red fondant and paint that as well. Using black buttercream, trace the contour of the lightning and the numbers.
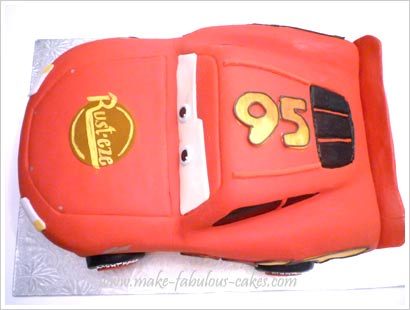
 Cut out the eyes(windshield), headlights and teeth from white fondant. For the sign "Rust-eze" on the hood, cut a round piece of brown fondant and paint the sign using the gel color mixture. The windows are painted on as well using black gel paste color.
 For the spoiler in the back, use a piece of red fondant cut to fit the rear end. When I made the spoiler, I did not have enough time to let it dry so I just attached it right away. The fondant has to be quite thick and a bit on the stiff side so that it can hold up its shape. Maybe it is best to let the piece dry overnight before attaching it.
Thank you to www.makefabulouscakes.com for the great help!
Once the cake is baked and cooled, torte the 9" x 13" sheet cake in half and fill with desired filling. Place the 8" square cake on one side of the cake. Carve the contours of the sheet cake to give it an aerodynamic feel. Save the carvings and place on the sides of the hood.
Comments
Post a Comment